
![]()
Planting For Success
Blueberry Planting Guide Bramble Planting Guide
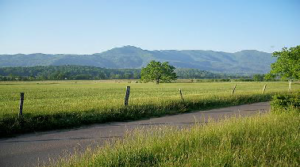
Here is where you can find the methods that I have used to help people successfully grow blueberry and bramble plants here in south-central Indiana. Your area, of course, will be unique; most likely where you live, you will have better soil than we do (every farmer thinks that, of course). Regardless of the differences in site and climate, there are some basic tenets that, if followed, should result in a healthy, vigorous berry plant. Go ahead and click the above guides if you want to go straight to them. I am going to take a little space to describe our farm and fruit plantings, to give you an idea of just what our soil and climate is like.
To begin, our farm has heavy clay soil with hardly any organic matter or humus. The land has been in my wife’s family for 100 years, and has had continuous activity up until 40 years ago. The land had been logged 3 times, and parts had been field cropped by renters until the soil was exhausted. Poor drainage is another attribute of this soil: even on the hillsides there are areas that remain bogs until the hottest part of summer. But, choosing sites that did drain, we have established healthy, productive stands of brambles and blueberries. Brambles are especially good at growing in poor soils, as they come from a group of plants that lead the way in habitat reclamation (from a forests point of view): look in any abandoned field or pasture (and some that are still in use) and you will see wild blackberries.
Our farm has very little flat ground, just some up by the road, the rest down in the valley bottom (and due to flooding potential, is off limits to berry plants). Although we are on the higher side of our valley, we reside in what, for lack of a better name, I call a super-valley (which I have come to call “The Big Frosty”). People living just 6 miles outside this cold hole in the Earth’s crust have no problem getting annual crops of peaches, sweet cherries, and apples (typical zone 5 temps and weather). Our spring weather assures us of about 1 peach and/or apple crop every 5-6 years. Due to the “cold air sinks” phenomenon, we’ll have clear nights in spring that will be 10-12˚ F cooler than those living outside the valley (unfortunately, our summer weather doesn’t work this way). This means that a 32˚F light frost outside the valley will give us a hard freeze of around 20˚F .
The only spring flowering, fruiting plant to withstand the erratic weather we have is the blueberry. It consistently delivers fruit every year despite the weather, with the one exception being the spring of 2007, when we had 2-3 weeks of 60-70˚F weather in late March, followed by 1 week of 20˚F weather in April. Plants died, trees were injured, all crops were lost. The only fruit we harvested that year were fall red raspberries (full crop due to summer flowering), Triple Crown blackberries (very modest, but they were the only blackberries in our whole valley that fruited), and blueberries. All the blueberries took a hit, but most made a crop at 50% yield, some a little more, and one, little Polaris, had a crop like nothing had happened out of the ordinary.
Berry plants are certainly tough, maybe more primitive than their orchard cousins; and in being so, grace us with delicious fruit, even in their times of tribulation.
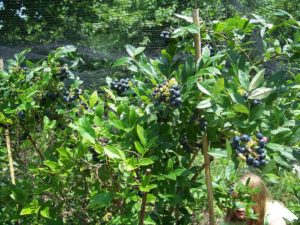
Blueberry Planting Guide
Remember to check out the FAQ page for information on
site selection.
Site Preparation:
Spacing: Highbush blueberry plants should be a minimum of 5′-6′ between the centers of each plant, and lowbush should be a minimum of 3′-4′.
Site can be in full sun to partial sun (less than 6 hours of full sun may see a drop in potential yields).
Most of a blueberry plants roots are in the top 8 inches of soil (forming a mat or skirt around the shrub), so your planting area need not be so deep as it should be wide. I like to dig a 3’x3′ wide hole, about 12″ deep. Remember, check drainage. You can plant on poor draining soil, you just need to mound the shrub so that it sits 6″-8″ above grade (shallow roots help you deal with wetness, but remember in droughty weather that anything “raised” dries out faster).
To refill the hole, use peat moss, shredded pine bark (not large nuggets, but mulch or mini-nuggets, and it does need to be pine), and the native soil (unless it is totally clay, in which case you also have poor drainage, so plan on mounding and using the “Soil-less” mix described below).
Refill back into the hole the above ingredients in a 1:1:1 ratio (1 part peat moss, 1 part pine mulch, 1 part native soil if not heavy clay). If you can’t find shredded pine mulch or mini-nuggets, spruce or fir bark mulch should work as well, and possibly even pine-needles. I like the pine mulch for two reasons: it stretches your peat moss, which is more expensive; and it gives a nice texture to the mix, helping to add air, channel water (percolation), and stabilize the peat.
For two shrubs, you’ll need one 3.8 cu.ft. bale of sphagnum peat moss (this is compressed, and expands to about 9 cu.ft. when you fluff it up, and check to make sure it is NOT pH balanced (it will say it is on the bale)); and 3, 3 cu.ft. bags of pine mulch (or 4-5, 2 cu.ft. bags, as some retailers sell the mulch as mini-nuggets). Once you get all this mixed into the hole, it’s time for amendments.
For one shrub, add 1.5# of alfalfa meal and a half cup of soft rock phosphate (optional), or 3 cups (~1#) of a balanced organic fertilizer such as Ohio Earth Food’s Re-Vita Pro (see our supplies page, as we are now selling this fertilizer in a 10# quantity; FOX FARM also sells an organic, acid-loving fertilizer especially for blueberries). Stir it all into the top 8 inches. If you are planting your bushes after the end of August, you can use the alfalfa meal and SRP, but do not use a granular fertilizer (manure or chemical based), as the nitrogen in it could cause some problems with the plant hardening off for winter. Instead, wait until early spring to top dress your plant under the mulch (with the granular fertilizer). Liquid fertilizer feeding is covered on our Plant Care pages, where you can also find information on the seasonal duties of the berry grower, such as pruning (when and what), fertilizing, and irrigation.
In the Bloomington, IN area, Black Lumber Company supplies quality sphagnum peat moss and pine bark mulch (sold as pine bark
mini nuggets, and remember not to get the regular size nuggets, as they are too large) for blueberry planting, and gardening in general. Bloomingfoods East sells a range of organic fertilizers.
The Soil-less planting method:
As mentioned above, if you have poor soil, you can use a 50:50 mix of sphagnum peat moss (must be sphagnum!) and shredded PINE bark mulch or mini-nuggets (rice hulls are an excellent substitute for pine bark!). Add the amendments as normal. This mix is useful for certain cultivars I’ve grown over the years. This soil-less method actually approximates a “best” blueberry soil type. I will say that all the cultivars like this mix, and production over the past couple of years in comparison trials has proven to me that production is increased by at least 15% overall, more in certain cultivars. Listed below are the cultivars that really excelled in production by using this soil-less mix, with no native soil added:
Chanticleer
Patriot
Spartan*
Nelson*
Northland*
Bonus
Jersey*
Rubel*
Chippewa*
Aurora
This mix is also the one to use for potted culture.
While they may be a bit more work to prepare, planting the blueberry properly will ensure decades of healthy production, reduced maintenance, and more smiles.
* yield in soil-less mix at least 30% greater than same cultivar grown in native soil with amending.
Planting your shrub:
Set the bush so that the top of its root ball is just covered by the mix in the hole. The planting area (which by now looks like a mini raised bed), after being amended with the peat moss and pine bark mulch, will likely have raised above the grade of your garden or yard slightly. This is fine, and will encourage rapid growth. DO NOT use compost or manure when planting your blueberry, as these amendments will raise soil pH above what the plant requires to thrive.
Aftercare:
Mulch, mulch, mulch…pine needles (best!), shredded leaves (no walnut), and shredded pine bark mulch are all excellent mulches for blueberry plants. DO NOT use hardwood bark mulch, hay or straw (clean, non-chaffy and dirt free straw may be used), as they alter pH and encourage weeds. During the year you plant it, and the following year, it would be good to water the bush regularly during the growing season (one good soaking weekly during the growing season, equal to about 5 gallons of water). You can top-dress (apply fertilizer under the mulch) with alfalfa meal (2 c.) or granular organic fertilizer (1c.) in March, and again in late May. Do not fertilize with granular manure or chemical based fertilizers (alfalfa is OK, and see Plant Care pages for liquid feeding directions) after July in zone 3-5, or after the end of August in zones 6-8. Blueberry plants do not like cultivation (due to shallow roots), so keeping it weed free with a thick, yet porous, mulch is essential to an organic blueberry plants vitality.
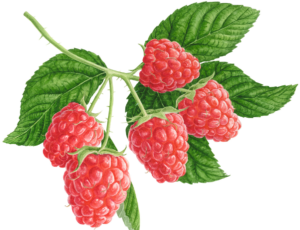
Bramble Planting Guide
Remember to check the FAQ page for information on
site selection
Site Preparation:
The number one spot for most brambles is full sun in fair to well draining soils. Remember that plants grown closer to the house or your daily rounds are more likely to get attention from you, and more appreciation. Afternoon shade in hotter climates is appreciated by all fall bearing red raspberries, though not essential.
There are two ways to go about planting brambles, in rows or in patches. If you tend towards garden work, and incorporate pruning and mulching in your annual tasks, rows are a good way to go as they are neat and tidy, and provide maximum production. If on the other hand you mulch every other year, don’t like to prune that much, or don’t have any long, skinny areas for row planting, then perhaps patches will work. Patches are less intensive to manage (at least in the beginning…you will have to eventually be strict with them), and as they grow are quite productive given the amount of care they get.
Rows would be good to have 18″- 2 feet wide, and patches about 3′ in diameter, or a 3’x2′ “bed” (1 plant per patch or bed). In the row, space red raspberries every 2′-3′ (closer spacing=more rapid fill of row), black and purple raspberries every 3′-4′, and blackberries 6′ . Triple Crown and Natchez blackberry are exceptions, as they are both trailing cultivars, and yield much more fruit when trellised. Spacing for these two cultivars should be a minimum of 8-10 feet. In my third planting of TC and Natchez here on our farm in 2013, I went wit a 12′ spacing. The young plants look very meek with all that space, but I have no doubt I’ll be thanking myself in 4 years, as these fruit monsters will be much easier to manage and prune than the closer spaced plantings.
Make sure all grass is removed from planting area. If you are cutting patches into your grassy lawn, leave enough room to mow around the patch (don’t leave 10″ of grass between the fence and your patch). Dig holes for the plants that are 12″-16″ deep and 12″-18″ wide, and loosen the top 3″ of soil immediately around the hole for another 4 inches or so.
Mix in some peat moss, compost, rotted manure (not too much), or quality topsoil (or a mix of these) along with half of the soil you removed from the hole (the amendments should replace half the volume of soil you removed). Add to this 1-2 cups alfalfa meal/pellets and 1/4 cup soft rock phosphate (optional but very good for increasing fruit production) and 1/4 cup kelp meal (again, optional); or 1 cup of balanced, organic fertilizer and 1/4 cup kelp meal (this again is optional, but supplies many micro-nutrients not often found in general fertilizers). Stir it all in well.
Planting your brambles:
Plant the bramble into the hole level with where it was growing in the pot. It is OK if the area is a little raised after adding the amendments. If the root ball seems a little tight, gently loosen the bottom of the ball. Spreading any loosened roots out, place it in the planting hole, back-fill with the mixture, and water well.
Aftercare for your bramble:
Yes. Mulch is good for brambles, too. I didn’t mulch one patch of blackberries I put in, and it is literally a jungle in the summer. I still get lots of blackberries from it, I just don’t feel as serene when I am picking there (Q:”Was that a snake?” A:”I don’t know. I can’t see anything for all these weeds!”). Shredded leaves are a good mulch for brambles, as is straw, pine needles, or pine nuggets.
Make sure you water regularly the year you plant them, and if it is a dry Spring. Fall red raspberry plants may need irrigation through late July to early September if the weather is droughty and hot. This is to insure constant and consistent fruit set, so that your supply of berries doesn’t “dry up”. For all other brambles (summer red raspberries, blackberries, purple and black raspberries), you will want to cut out old canes and burn or remove them from the growing area. Old canes are the ones that produced fruit for you, and now look withered and dry. This will help reduce any disease potential that may exist. Remember, on these plants, the new canes won’t fruit until next summer, so you want to keep them healthy and free of possible infection.
When the above brambles start to finish with their fruit, the fall red raspberries begin with theirs. I manage all of our fall bearing raspberries the same way: I mow them to the ground every winter. After the canes go dormant, I grab my scythe blade and mow them down. I remove all the debris from the growing area. This will help the fall raspberries to produce earlier, as well as keeping fruit size up and disease/pests down. As the new canes come up in the row or patch, prune out the weaker, spindly, horizontal growing ones. Also mow down any that are getting “out-of-bounds” (or dig and transplant them to a new area). If you have had cane disease problems with your summer raspberries, it may be worth trying fall raspberries, as it is much easier to keep the patch tidy and free of old canes.
When spring comes back around, go ahead and freshen the mulch (again, use a thick, porous mulch, and avoid mulches that will mat and prevent rain from penetrating to the roots). For all of the brambles, add about 1-2 cups alfalfa pellets/meal per foot of row, plus a half cup of soft rock phosphate, or 1 cup of balanced organic fertilizer. See Plant Care pages for liquid feeding directions and top-dressing of your plants.